Are you using potentially dangerous exercises in your workout? You have to be very careful with strength training equipment because it may not be the most effective or functional option available. How do you know that the exercises you are performing are safe? Found below are some potentially dangerous exercises with suggestions on how they should be done correctly or avoided completely.
Sit-up
Traditional abdominal exercises such as the sit-up, incline sit-up, and hip-raises are exercises that are used to train the obliques and the upper and lower abdominals.
They are performed by first anchoring the feet on an abdominal board, which prevents you from sliding back, then raising your shoulders up toward your feet, tensing your abs at the top of the movement. Slowly lower your shoulders back down and then complete the movement again.
The dangers of performing this movement are the shearing forces on the vertebrae and spinal discs when you have a flexed and rounded spine. In this position, the pressure is mostly placed on a very small area of the disc area, which can cause small ruptures. The safest and most productive way to train the abs is to use the brace and hollow technique. This is a basic isometric exercise that helps strengthen the abs and the muscular girdle around your waist.
Sit ups
Pec Deck
The pec deck is an exercise that trains the chest (pectorals) and shoulder (front deltoid) muscles.
This exercise is performed by sitting at the machine with your back flat against the back pad. Place your forearms on the padded levers and position your upper arms parallel to the ground. Pushing the levers slowly together and squeezing your chest muscles at the end of the movement is the trick. Return slowly to the starting position.
This exercise is potentially dangerous because it places the shoulder into one of its least stable positions, the dislocation position. Because of the extreme position when performing this exercise at the starting position, it can also cause tearing of the ligaments and injury to the rotator cuff tendons.
More effective and less dangerous is the bench press, keeping the arms at shoulder width and exercising in the strongest range of motion (partial reps) and the parallel bar dip with the elbows out.
Behind the neck press
This exercise trains the neck (traps) and shoulder (deltoid) muscles and is performed by placing a loaded barbell on your upper back just above the trap muscle. This exercise is done by standing with your feet about shoulder-width apart. Placing your hands on the bar about three inches wider than the width of your shoulders, pushing the bar overhead to arm’s length, holding it there, and then slowly lowering it back down to your shoulders. This exercise can also be done seated. Try performing it in a smith machine or power rack for added safety. This is an exercise that places the shoulder joint into the dislocation position and the range of motion puts unnecessary stress on the rotator cuff tendons of the shoulders. Many trainees may experience injuries from this behind-the-neck movement. As with before stick with dips and bench presses for your shoulder work.
Dead lift
The dead lift is a compound movement that works the hips and lower back and also exercises the hamstrings and glutes (buttocks). You can perform the dead lift by approaching a loaded barbell and taking a stance about as wide as your shoulders. Grip the bar so that your arms are slightly on the outside of your thighs. Your feet should be pointing straight forward, with your shins about two to three inches from the bar. Heave the load upward using the hips and lower back, keeping the back straight and the bar as close to the shins as possible. At the top of the movement, hold for a few seconds and then lower the bar to the starting position. The exercise has a knock-on growth effect on the whole body when worked hard. The problem with the lift is that if the spine becomes rounded during the lift, it then becomes dangerous. Because of the forces working on the vertebrae and the spine, injuries may occur. A lot of these problems can be solved by keeping the back as straight as possible during the lift and keeping the bar held close to the body during the lift, as the forces are then not that excessive.
Leg extensions
Leg extensions are arguably one of the most popular leg exercises for strengthening the quadriceps (thigh) muscle.
These are done by using a leg extension machine and sitting in the seat with your feet hooked under the padded lever. Raise the weight with your legs until they are pointing straight out in front of you. Hold briefly, and then slowly lower the weight back to the starting position.
Leg extensions are a potentially dangerous exercise because when only the shin is in motion, the exercise draws the patella back onto the femur, increasing joint compression forces, which can damage the connective tissue and the ligaments supporting the knee joint. It can also cause anterior knee pain, so people with existing knee problems may aggravate them by doing this exercise.
For greater safety and equal effectiveness, try doing the squat, leg press, and lunge for safer and more functional use.
Gary is the author of several ebooks, including “Maximum Weight Loss in Ten Weeks” – the complete ebook and time-saving solution for burning away unwanted fat, and “Maximum Weight Gain in Ten Weeks” – easy-to-use and follow techniques that serve as a guide to muscle growth without having to “live in the gym”.
For most people, the hardest part of exercising is just getting started. Hectic schedules and lack of time certainly contribute to the excuses. But for many people, a lack of basic workout knowledge intimidates them and prevents them from even getting started.
It’s easy to understand why some feel overwhelmed about beginning a new fitness routine. Virtually every day the media is bombarding the public with the latest “diet research” oftentimes contradicting what may have been reported just weeks earlier. And infomercials swear that 20 minutes of this or 15 minutes of that is all that is required to look like a Hollywood star…
With so much information (and misinformation), it can be hard to decipher what fitness regimen will really deliver results. But truthfully, it’s not difficult at all to determine what workout will provide health benefits.
An easy way to get started is by utilizing the F.I.T.T. principle. This acronym stands for Frequency, Intensity, Time, and Type.
Frequency: As you might expect, this refers to how often you will exercise. After any form of exercise is performed your body completes a process of rebuilding and repairing. So, determining the frequency of exercise is important in order to find a balance that provides just enough stress for the body to adapt and also allows enough rest time for healing.
Intensity: Defined as the amount of effort or work that must be invested in a specific exercise workout. This too requires a good balance to ensure that the intensity is hard enough to overload the body but not so difficult that it results in overtraining, injury, or burnout.
Time: Again, this is rather self-explanatory. Time is simply how long each individual session should last. This will vary based on the intensity and type.
Type: What type of exercise will you be doing? Will an exercise session be primarily cardiovascular, resistance training, or a combination of both? And, what specific exercises will you perform?
Now you know the F.I.T.T. principle so planning a workout program and getting started should be a breeze. The ACSM (American College of Sports Medicine) has F.I.T.T. guidelines both for cardiovascular work and strength training. For cardiovascular benefits, they recommend exercising for a frequency of 3-5 times per week, at an intensity equal to 60-85 percent of your maximum heart rate for a time of 20-60 minutes. For strength training, they recommend working out a minimum of two times per week at an intensity that is equal to 70-85 percent of your one rep maximum (the maximum weight you can use for one rep) for 8-10 reps and 1-3 sets.
Planning a new fitness routine by breaking it into the four F.I.T.T. principle pieces allows you to quickly create a workout plan that will truly provide you with results.
For beginner exercisers choosing the Type of exercise may be the best place to start mapping out your routine. After all, if you have the perfect frequency, intensity, and time but hate the actual exercise then you’ll never do it. So, start with something you like. This may be walking, biking, swimming, or something else.
Next, determine the Frequency. Consider how much time each week you truly will devote to this workout. Be realistic. There’s no purpose in setting expectations so high that you likely will fail. Remember, the ACSM guidelines are 3-5 times per week, so a good start would be three days.
If you are very limited in your schedule then determining your Time would be the appropriate next step. Otherwise, choose your Intensity level, which will help determine how long your workout session should be. For example, a higher intensity will typically provide more benefits (such as burning more calories in a shorter amount of time). So, choosing to jog may require only 30 minutes of commitment versus walking which may require 45-60 minutes.
Here’s a quick example of both a cardiovascular and resistance workout program that utilizes the F.I.T.T. principle. Walk (Type) at 4 MPH (Intensity) for 45 minutes (Time) four times per week (Frequency). Perform exercises with dumbbells (Type) at 70% of your maximum 1 rep strength (Intensity) for 8-12 reps (Time) 3 times per week (Frequency).
That’s all there is to it. Now get out there and get FITT!
Lynn Bode is a certified personal trainer specializing in Internet-based fitness programs. She founded Workouts For You, which provides affordable online exercise programs that are custom designed for each individual.
Beginner’s Guide to Fitness What to do when you are ready to get into shape!
So you are finally ready to turn from your couch potato ways, and trade your T.V. remote in for a dumbbell! Congratulations, and welcome to the wonderful world of fitness! I commend you on your resolve to lose weight and get into shape! Now where do you begin? These days there sure is a lot of talk about diet and fitness, whether it is a new diet pill or a piece of exercise equipment. It is enough to make your head spin, and certainly enough to confuse the beginner. Take a deep breath, and follow these simple tips to go from being a fitness beginner to a pro!…
TIP #1: GET MOVING
The first thing you need to do, as a fitness beginner, is to start moving! I mean this literally. Get up, and walk out your front door. Now walk down the street. Now turn the corner. Keep going! Do you get the picture? Start introducing your body to fitness by going on walks. These walks will probably start out slow and short, but before you know it they will be brisk and long. Try to work up a sweat as you tour the neighborhood. Make it a habit to wake up early to go on your walk, or consistently go on a walk before you go to bed. These walks will get you to start burning calories each day, and will also begin to build your cardiovascular endurance.
TIP #2: STRETCH
Once you become a pro at walking, you will need to add something new to your routine. Stretch before and after your walks. Start by reaching down to touch your toes and holding it for 30 seconds. You will feel tightness on the backs of your legs, in your hamstrings. Now place your palm against a wall at chest level and turn your body away from it. As you hold this for 30 seconds you will feel a stretch in your chest. Most inactive people have tight hamstring and chest muscles due to prolonged sitting, so it should be your priority to stretch these muscles out. You will be pleasantly surprised at what this will do for your posture!
TIP #3: CLEAN YOUR DIET
Fitness professionals like to claim that 80% of what your body looks like is directly related to what you eat. In other words, if you are eating burgers and fries and visiting the gym every day, you are still going to look like you are eating burgers and fries! It is time to clean up your diet, so you can continue on your fast track to fitness.
· Rule #1: No more fast food. Fast food is cheap, available, and quick, but it is far from healthy. You are better off avoiding it completely. · Rule #2: Eat 5 servings of fresh fruits and vegetables every day. Your body needs the nutrients found in these foods, and they will fill you up without empty calories. · Rule #3: Eat 4-5 small meals a day, rather than 2 large ones. This will keep your metabolism high all day, and turn you into a calorie-burning machine!
TIP#4:
JOIN A GYM After you have mastered walking, and stretching, and have started to clean up your diet, you are ready to join a gym. Don’t be intimidated or scared of this concept, the gym is a friendly place where people go to burn calories and build muscle! Find a local gym that has a convenient location near your home or workplace. The key to making your gym membership worth its monthly dues is to use it consistently. Go to the gym no less than three times a week. While you are there begin a resistance training program as well as a cardiovascular program.
TIP #5:
FIND A BUDDY There is no better motivator to get you to the gym than knowing that someone is there waiting for you. If you find yourself slacking off in your workouts, or skipping the gym, a workout buddy might be just what you need. Find a friend with whom you share similar fitness goals, and become workout buddies. Agree to meet three times a week at the gym, and encourage each other throughout your workout. You will find that this makes workouts motivating and fun.
There you have it, all you need to know is to get yourself up off the couch and into a healthy, fit lifestyle! Making the decision to get into shape will be the best one you make in your life, and I wish you all the best. To your health!
Diana Keuilian, author, ACE-certified Personal Trainer, and co-founder of HitechPersonalFitness.com offers online personal training and nutrition programs that fit your budget and schedule. Whether your goal is to lose weight, firm, and tone, or build muscle, HitechPersonalFitness.com will build a custom-designed program just for you.
Whether you travel for business or pleasure, being on the road usually leads to one thing: weight gain. From missed workouts to large restaurant meals, travel days often become high-calorie days. Next time that you go on the road keep the following tips in mind, and come home leaner than when you left!…
TIP #1: STICK WITH CIRCUITS
When you find yourself in a poorly equipped hotel exercise room, make the best of it. You are not going to be able to get in a normal workout like you would at your local health club, so you will have to make do with the available equipment. A great way of doing this is to work out in a circuit. Most hotel exercise rooms will have at least one piece of equipment for each body part, and they are usually as empty as a ghost town, so a circuit will work well. Do one set on each body part, and then hop on a bike or treadmill for 10 minutes. Repeat this two more times, and you will find yourself sweating up a storm.
TIP #2: BURN CALORIES EVERY DAY
If your travels keep you too busy for a workout, or if your hotel does not have an exercise room, make a conscious effort to burn calories every day. There are many different ways to fit some calorie burning into your day. Go on a brisk walk after your day’s activities. This is a great way to see a new city, and also a great way to burn off the rich dinner you just ate! Take the stairs instead of the elevator in your hotel and any other buildings you visit. Go on a short jog in the mornings or evenings of your stay. If your hotel has a pool, swim a few laps each morning or evening.
TIP#3: WATCH PORTION SIZE
Eating out is a must when traveling. Whether you are visiting 5-star restaurants or fast food diners, you are faced with the same problem: large portions. While the easiest thing to do with a large portioned meal is to simply eat it all, that isn’t the easiest on your waist! When you order your meal ask the waiter or waitress to bring you a to-go box with your meal. This way you can take half of the meal and place it safely into the box before you even begin to eat. You will have no choice but to eat a healthy portion, and you have your next meal taken care of. If you would rather not carry around a to-go box then ask that your entrée be made into a smaller portion. If it is dinnertime ask for the lunch-sized entrée.
TIP #4: AVOID FRIED FOODS
While fast food restaurants are definitely convenient, with their low prices and quick service, this convenience is not worth the inevitable weight gain brought on by burgers and fries. When you travel, keep this in mind: avoid fried foods. While this is always good advice to follow, it is even more important to abide by it while traveling. While traveling you are most likely to be burning fewer calories each day than you would normally burn at home, and you are consuming more calories due to your schedule of eating out. You are walking a fine line, and eating fried foods would throw you right over the edge of weight gain. A gram of fat contains 9 calories as compared to the 4 calories that proteins and carbohydrates carry, so you can see that consuming fried foods will drastically increase your calorie intake. If I still haven’t convinced you to pass on the French fries, keep in mind that heartburn and indigestion are never fun, but how about experiencing them on an airplane, bus, or train ride?
TIP #5: BODY WEIGHT ROUTINE
When your hotel doesn’t have an exercise room, and you still want to get in some type of workout, try this bodyweight routine right in your hotel room:
· 20 Jumping Jacks: you remember these from grade school! Start jumping!
· 20 Push-Ups: Get on the floor, keep your back flat, and push!
· 20 Jumping Jacks · 20 Crunches: Keep your hands behind your head and breathe out as you crunch up.
· 20 Jumping Jacks
· 20 Triceps Dip: Place your palms on the edge of a chair, bend at your elbows, and push yourself back up!
· 20 Squats: Stand in place, with your knees shoulder width apart, squat down!
· 20 Jumping Jacks
· 20 Lunges: Keep your hands on your waist, step forward keep a 90-degree bend in your knee, and press yourself back up!
Next time your work or pleasure takes you away from home, keep these tips in mind and be pleasantly surprised with your results! Have a great trip!
Diana Keuilian, author, ACE-certified Personal Trainer, and co-founder of HitechPersonalFitness.com offers online personal training and nutrition programs that fit your budget and schedule. Whether your goal is to lose weight, firm, and tone, or build muscle, HitechPersonalFitness.com will build a custom-designed program just for you.
Lack of flexibility is now seen to be a major cause of general health problems and sports injury and is being linked to everything from stress to back pain, and even osteoarthritis. It also means that nagging injuries, especially around your joints take longer to heal.
Latest studies show that up to 60 percent of the general population with bad backs and knees have tight hamstrings and hips and the main cause is a lack of flexibility…
Active-Isolated Stretching (AI)
Olympians have been employing Active-Isolated Stretching (AI) now for about 10 years, but it has only recently been brought to the public’s attention.
I have used this technique on my clients for quite a while now with great success while adding renewed life and spring to tired-out muscles. AI stretching prevents injury, as conventional stretching can cause real harm such as muscle pulls and tears.
AI stretching does what stretching is supposed to do; it transports oxygen to sore muscles and quickly removes toxins so recovery is faster. It also works as a deep massage technique because it activates muscle fibers during the actual stretch.
How to Stretch
Before stretching, dress in loose clothing and try and acquire a five-foot length of rope and tie a loop in the end. The purpose of this is to loop the end of the rope around the exercising appendage to squeeze the last couple of inches of stretch from the exercise.
Find a comfortable place to stretch either on your bed, a carpeted floor, or on a mat. Isolate the muscle or group you want to stretch then contract the muscle opposite. This causes the isolated muscle or group to relax straight away and when it does it is ready to stretch. Gently and quickly stretch the isolated muscle until it can’t be stretched any further; now give yourself a gentle pull with your hands or rope. Go as far as you can and then hold the stretch for no more than 2 seconds then release, do this for a total of 5 repetitions on the isolated muscle or group.
The reason for just a 2-second stretch is that when a muscle realizes that it is being forced into a stretch it contracts to protect itself from being overstretched. If you can beat this contraction you’ll be well on the way to a greater Range of Motion.
Remember to hold for no more than 2 seconds, release, return to the normal position, and repeat for the five repetitions. Try not to have any hesitations between stretches and make it as fluid as possible.
Try to stretch every day if possible, remember to:
· Work one target muscle at a time. · Contract the muscle that is opposite the targeted muscle, which will relax in preparation for its stretch. · Stretch it gently and quickly. · Release it before it realizes that it has been stretched and goes into its protective contraction. Below are two exercises that can be done straight away even while you are at work to stretch that tension and stress from your body.
1. Lie down on the floor with your buttocks against a wall and your legs straight up the wall. Slowly flex your toes towards your knees, hold for two seconds, and repeat five times. This will loosen up your lower back and stretch your hamstrings and hips giving instant relief for tired backs.
This exercise can be done while at the office anytime you start to feel that stress and tension building up.
2. Sitting in a chair and putting one leg out straight, flex your toes towards your knee, now lean towards that foot, stretching your hands towards it and letting your head and shoulders follow, hold for two seconds, and repeat five times. This will create a stretch right across your lower back and neck.
A flexible body is:
· More efficient · More easily trained for strength and endurance · Enjoys more range of motion · Stays balanced more easily and is less prone to injury · Recovers from workouts more quickly, and feels better.
Gary is the author of several ebooks, including “Maximum Weight Loss in Ten Weeks” – the complete ebook and time-saving solution for burning away unwanted fat, and “Maximum Weight Gain in Ten Weeks” – easy-to-use and follow techniques that serve as a guide to muscle growth without having to “live in the gym”.
As you have undoubtedly heard, college students around the country are gaining weight at a rapid rate. A recent study by Cornell University found that on average, college freshman gain about 0.5 pounds a week, which is almost 11 times more than the average weight gain among 17-and 18-year-olds and almost 20 times more than the average weight gain among American adults…
Exercise is a great way to ward off extra pounds, but what college student really has time to visit a gym multiple times each week? Hectic, stressful schedules are almost always partially to blame for the extra weight gain in the first place! A great solution is to find exercises that you can perform right in your dorm room. Try out the following Dorm Room Exercise Routine right in your own room! Please remember to consult your physician before beginning an exercise program.
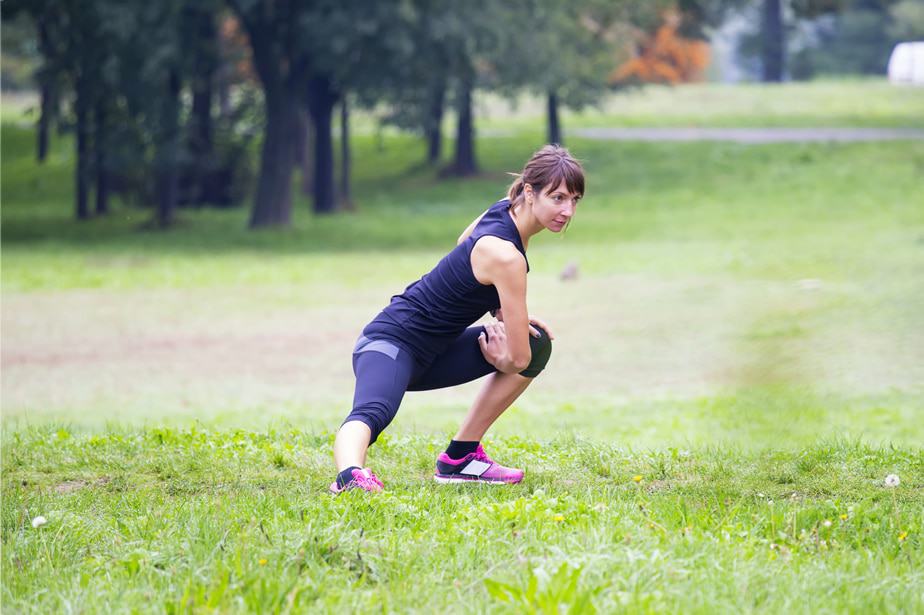
Lunges
Equipment: Optional Dumbbells or Barbells – This can be done simply with body weight.
Starting Position: Stand with your feet together and a barbell across your shoulders, or, if using bodyweight, hands on your hips. Take a large step forward and bend your knees down into a lunge position.
Movement: Exhale as you press yourself back up to a standing position, or continue through with your step into another lunge.
Push Ups
Equipment: Optional Exercise Matt
Starting Position Beginner: Get on all fours on the mat with your hands directly under your shoulders. Walk your knees back until your upper body is stretched out and your back is flat. Starting Position Advanced (shown in picture): From the all-fours position, walk your feet back until your body is stretched out and your back is flat.
Movement: Inhale as you slowly lower your body down towards the mat. Be sure to keep your back straight and not allow it to sag in the middle. Exhale as you press yourself back up to the starting position.
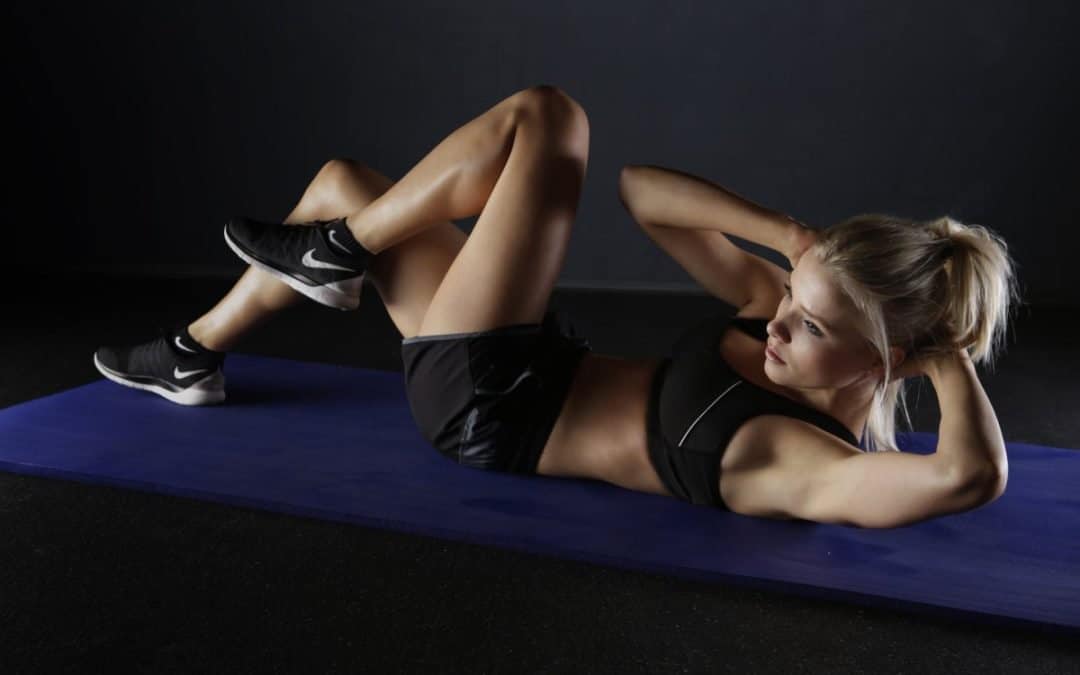
Crunches
Equipment: Optional Exercise mat
Starting Position: Lie on your back on the mat with your knees bent and feet flat on the floor. Support your head by placing your hands behind it, and keep your eyes turned up towards the ceiling throughout the entire movement.
Movement: Exhale as you raise your upper body up a few inches off of the mat by contracting your abs. Be sure to keep your back straight and avoid pulling yourself up with your hands. Hold yourself in this contracted position for a moment before slowly lowering yourself back down to the starting position.
Couple the above exercises with regular walks or jogs around campus, and you will be well on your way to combating college weight gain.
Diana Keuilian, Certified Personal Trainer, and author of “Avoid The Freshman Fifteen”, has a proven method for avoiding college weight gain.